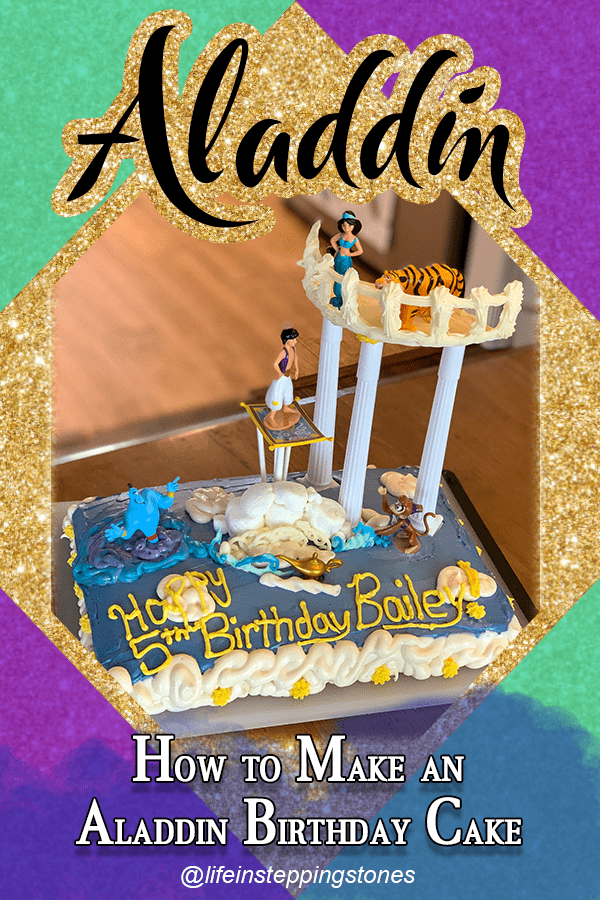
For my son’s birthday this year, he requested an Aladdin theme! I got to make two different desserts for him to celebrate: cupcakes for his preschool class and a cake for his birthday celebration (read “How to Throw a Birthday Party During the Pandemic” for details on his Aladdin theme decorations).
I was originally planning to make a yellow cake, but due to the pandemic’s shortage of, well, everything, the stores only had gluten free chocolate cake mix available. I’m actually thrilled because the King Arthur Gluten Free Chocolate Cake Mix is AMAZING and was a huge hit with both his preschool class and our family alike.
Cake and Frosting Recipes
To bake the cake and cupcakes, follow the recipe on the box for King Arthur cake mix:
- 1 Box of King Arthur Gluten Free Chocolate Cake Mix
- 2/3 cup vegetable oil
- 1 1/3 cups of water
- 4 large eggs
For the cupcakes, I had to keep them in the oven for about 40 minutes, instead of the recommended 18-22 minutes! Maybe my oven is just slow, but they were nowhere near done with the time recommended. Other than that, they turned out perfect and I can’t complain! For the cake, I had to keep it in the oven for about 50 minutes, instead of the recommended 25-30 minutes. I recommend putting your oven on the time listed on the box and then checking from there.
I love making my own frosting every year too.
This is my dairy free frosting recipe:
- 3 cups powdered sugar
- 1/3 cup Earth Balance Soy Free Butter, softened
- 1 1/2 tsp vanilla
- 1-2 tbsp Ripple Vanilla Pea Milk (I use the small lunchbox size containers that don’t need to be refrigerated for baking)
- Liquid food coloring (I love this brand of Gourmet Food Coloring Liquid)
Mix the ingredients together and add milk for thinner consistency and add powdered sugar for firmer consistency.
For cupcakes, I like a slightly firmer consistency so the frosting holds nicely. Whereas for the cake, I use multiple consistencies: thinner for the crumb coat and base layer, firmer for the decorations.
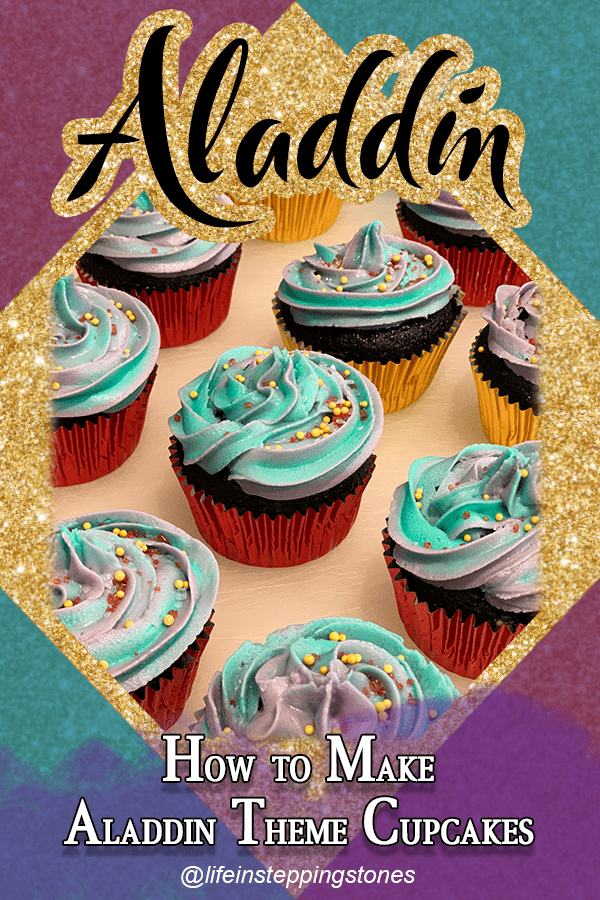
Aladdin Cupcakes
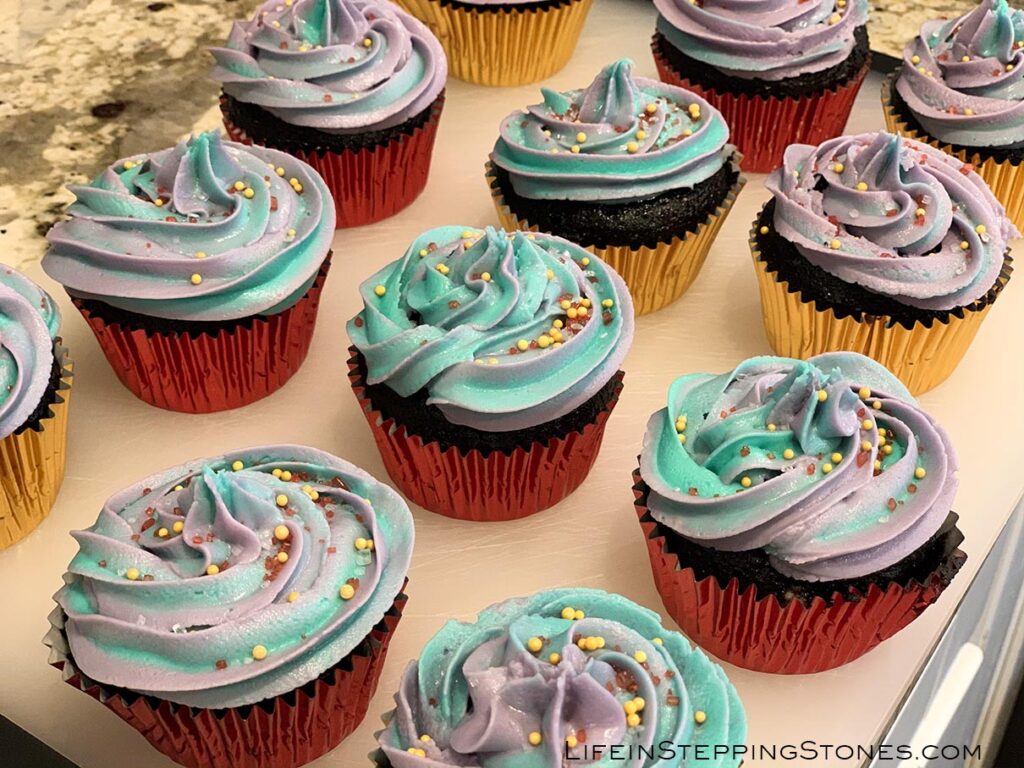
This was my first time creating a two-toned frosting design, and I’m obsessed with it now.
Step By Step Instructions
- Separate the frosting into two bowls.
- Add purple food coloring to Bowl A.
- Add blue and green food coloring to Bowl B and mix together to make aqua.
- Put together your piping bag, using the medium star tip on the end, and place standing up. I used a canning jar to keep it held up and supported.
- Spread the purple frosting around the sides of the piping bag, leaving the center empty.
- Put the aqua frosting in the middle.
- The initial squeeze comes out as just one color, but after running it for a little bit, the two tones will appear together.
- Starting from the outer rim of the cupcake, wrap the frosting around the top, slightly overlapping as you make your way into the center.
- Add gold and red sprinkles as desired.
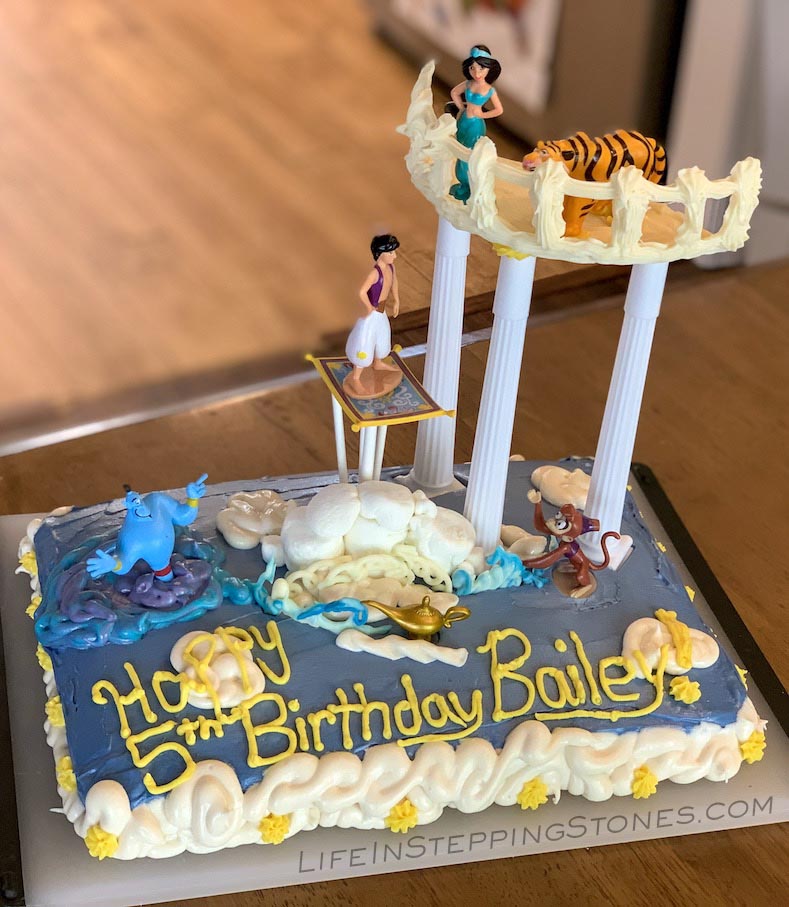
Aladdin Birthday Cake
I baked the cake a few days in advance and then froze it, wrapped in saran wrap and tinfoil.
In addition to the frosting and cake mix above, to make this cake you need:
- Ghirardelli White Chocolate Melting Wafers
- Large and Mini Marshmallows
- Wilton Grecian Pillars for Cake
- Medium length Lollipop sticks
- Glue dots
- Aladdin cake topper toys
To make the mold for the balcony, you need:
- Thin cardboard or card stock
- Scissors
- Parchment paper
- Stapler
White Chocolate Balcony
My first mission was to make the white chocolate balcony! First, I cut a piece of card board into the size I needed for the cake. I curved it, and then traced it while holding it up, onto another piece of cardboard (this is for the bottom). After tracing it, I cut out the bottom and taped it to the curved piece to hold it’s shape. I then cut a piece of parchment paper and stapled it onto the curved cardboard. I laid the curved cardboard down so the rise of the curve was lifting up towards me and parallel with the table. I then placed it onto a baking tray that I lined with parchment paper.
Afterwards, I melted the white chocolate in the microwave per the package instructions (make sure to melt on medium heat!) and mixed it until it was fully melted. I put the melted chocolate into a piping back and piped the pattern of the balcony railing. The chocolate does not run when put down and holds very well! I then placed the tray in the refrigerator for five minutes and let the chocolate set.
After it was set, I took it back out, removed the chocolate from the parchment paper mold, and stood it up on the parchment paper lined tray. I melted more white chocolate and piped it onto the bottom, creating the balcony floor. Be sure to pipe it right up along the balcony. After finishing the floor, I placed the tray in the refrigerator for another 5-10 minutes to set.
The remaining chocolate I dyed blue and mixed together with the white chocolate in a piping bag to create the standing Genie smoke. I drizzled the patterns to my liking onto parchment paper and place it into the refrigerator to set.
Marshmallow Cloud
To make the marshmallow cloud next to Aladdin, I used three large marshmallows and three mini marshmallows. I cut the tops off each of the large marshmallows and stuck them to the tops and sides molding them as they stuck to create a more cloud-like shape. I then placed a mini marshmallow on each side and one on top.
Floating Aladdin
I purchased and used these Aladdin Cake Toppers for this cake. I used a glue dot to hold Aladdin to the magic carpet. From there, I cut four medium lollipop sticks down to size (to make them a nice height next to the pillars) and placed glue dots on the top of each stick. I then stuck the bottom of the magic carpet to the sticks. The glue dots held well and they also came over easy so my son could play with the toys after!
Frosting the Cake
For the base layer of the cake, I combined Navy Blue and black food coloring. I kept a thinner consistency as I mentioned earlier and frosted the cake. Normally I do a crumb coat and another coat, but the cake was still very frozen when I started and I didn’t end up getting any crumbs into the frosting! My next step was creating the clouds. I added powdered sugar to my frosting to help firm it and I used a medium round tip to pipe it onto the cake, along the sides, in a swirling motion. I then piped clouds on top.
Using the two-toned frosting technique I learned earlier from the cupcakes, I made a blue and purple frosting to create the genie smoke. I used a smaller tip to pip the smoke pattern onto the cake. Once it was mostly completed, I place the Genie into the smoke. I then piped a little more frosting around the base of the Genie to cover it.
I piped small yellow stars around the sides using the star tip and piped the message using a small round tip.
Final Touches

Lastly, I placed the pillars on top of the cake. I pipped yellow frosting onto the tops of each to help hold the balcony in place, and then placed the balcony on top. I piped remaining frosting on the bottom of Princess Jasmine and Raja to help them stick to the chocolate balcony. Once the balcony was set up, I placed Aladdin, already attached to the lollipop sticks, onto the cake. I put the marshmallow cloud in front to help blend the look of the sticks. For my final touch, I added the small pieces of blue chocolate I had made as Genie smoke by the lamp, leading to the smoke frosting pattern, and added a few more chocolate pieces in front of the marshmallow.

Great job with the cake and cupcakes! Your son must have loved it!
Thank you! He kept trying to sneak a peek for days and I somehow managed to keep it (mostly) a surprise. He was thrilled when he saw the finished product!
Oh this is adorable!! The cupcakes look like Jasmines attire!! Love it!!
Thank you! It was a fun new experience mixing the two colors!
Wow… this is truly amazing. I am definitely making it for my daughter on her birthday.
Thank you! Your daughter will LOVE it. My son’s eyes tripled in size when he saw it. He was so excited.
Ok that is amazing! I tried making a themed cake once and it is just not one of my gifts in life, ha! But yours looks incredible!
ha! Thank you! It was a lot of fun to do!
You are so creative and talented- super impressed with how you did the balcony!
Thank you so much! I was so excited when the balcony worked and was pleasantly surprised with how simple it actually was to make in the end!
So cute! I love the colors of the cupcakes! What a great idea!
Clever ideas, and it turned out lovely!
Very cute! Aladdin is my favorite Disney movie, so I am in love with this cake and cupcakes!
I love it! You did a fantastic job with the decorations.
How amazing! You did a great job that anyone would love this theme!!
Wow! You are really talented! I love the theme too.
Great job Mom! Love the smile on your son’s face!
Your Aladdin Birthday Cake looks awesome! And the cupcakes are so colorful! My kids love getting toys on top of their cakes, so they’d enjoy this!
Such a cute cake and cupcakes. How fun. Perfect for a kid’s party.
Both the cake and cupcakes turned out beautifully! I would never have attempted something so complicated.
Nice job! I bet your little one LOVED it!
Nice job! Its great when your vision comes to fruition! Especially when its for your own kiddos!
Beautiful job! I used to love making themed cakes for my daughter.
Some great ideas on putting the cake together. But I think the best is the picture of your son’s face when he first saw the cake. Priceless.
What a fun idea! I love the cupcakes!!
Great work on the cake and cupcakes; definitely looks like something that can be easily done.
My nieces would absolutely adore this cake. Looks so delicious and very cool. It’s as if your favourite characters are coming to life. I’m a Jasmine fan!
Wow so impressive! I love that cake and the cupcakes look yummy!
So creative! Everything came out gorgeous.
Wow, amazing ideas and work.
Thank you for your recipe and ideas. I will try this recipe next month (on my son birthday).
BTW, i love jasmine too.
You did such a great job. I am jealous of your piping skills and that two-tone icing looks amazing.
These are so adorable! What a fantastic idea!