This post contains affiliate link(s). An affiliate link means I may earn advertising / referral fees if you make a purchase through my link, without any extra cost to you. It helps to keep this blog afloat! Thank you for your support.
This summer, while we were lucky that Covid cases were low, and our family and friends were fully vaccinated, I decided to throw our daughter a first birthday party in the theme of the TV show “Shimmer and Shine”. She fell in love with the show in the months prior and would dance, clap, and smile along to the theme song.
As usual, I went all out on this party. I had told myself that with a first birthday “she won’t remember” and to “keep it simple” but between not being able to celebrate the entire past year, and having plenty of time to spend at home, I couldn’t resist! Plus, our 5 year old was thrilled and expected her to have one of my famous (to him) all-out parties. So without further ado, here’s how to make the ultimate Shimmer and Shine party, whether it’s your baby’s first birthday, 2nd, 3rd, 4th, 5th, etc, these tips will ensure a magical wonderland for your child!
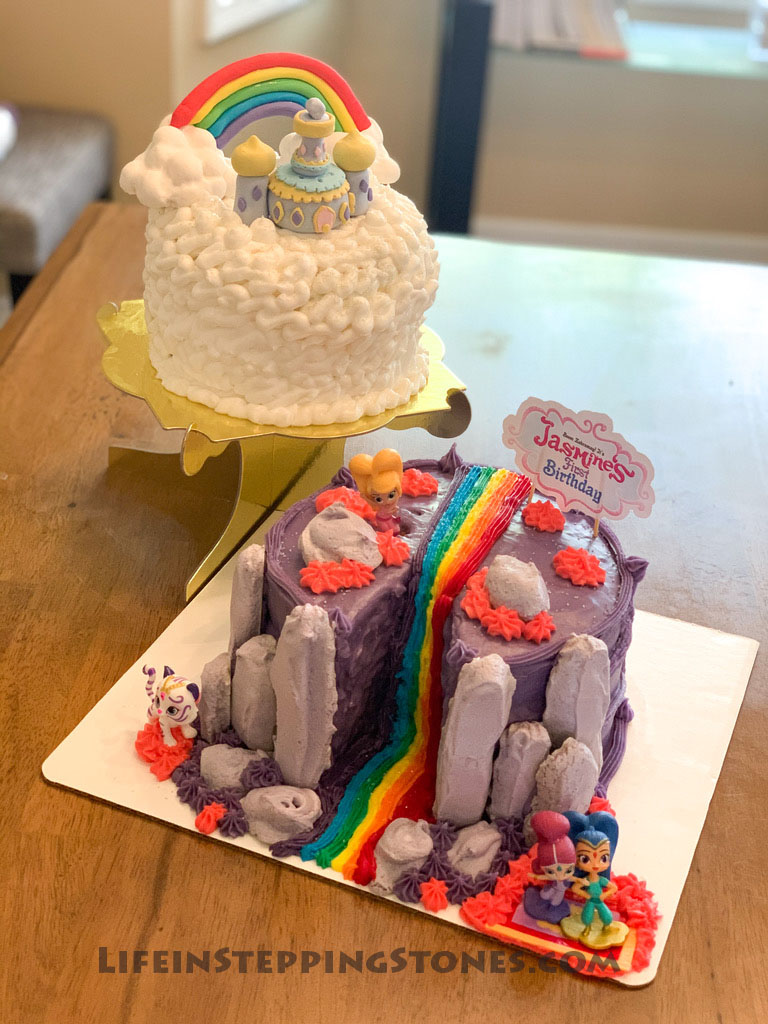
My first act of business was to create Gum Paste figures for her Shimmer and Shine Birthday Cake (separate blog post coming soon with steps to make the cakes!).
Gum Paste Figures

This year, I decided to try my hand at gum paste for the very first time. After researching, I found that you could make gum paste figures at least 3 weeks in advance (and honestly, a lifetime in advance if you never plan on eating it). This made it easy for me and took the pressure off! After all, if I totally messed up, I had plenty of time to learn, and if it turned out fabulous, I would be done with plenty of time to spare.
The most challenging part about using gum paste is mixing in the colors (especially if you plan on using red…it’s just as much of a pain with gum paste as it is with frosting). If you plan on using a lot of red, I highly recommend purchasing red gum paste separately. For most other colors, you can use white and mix the colors in using gel food coloring and toothpicks. Keep in mind that the colors do get richer over time as it settles in.
Before I get into this, I will preface this with that I’ve never been a sculptor, but I did love making little figurines with clay as a child. As an adult, I’ve found clay more challenging (because of my wrist issues), but I found gum paste to be very manageable once it is warmed up in your hands. Plus, you get to eat the scraps and anything that goes wrong, so it’s a win-win all around.
What You Need
- Satin Ice White Gum Paste
- Satin Ice Red Gum Paste (only if using a larger amount of the color red)
- Wilton Gel Food Coloring
- Toothpicks
- Parchment Paper
- Saran Wrap
- Wilton Fondant and Gum Paste Tool Set
- Fondx Edible Sugar Glue
How to Make Colored Gum Paste
- Before you get started, have a picture or drawing for reference of what you’re trying to create. Place parchment paper on the table or work surface for a non-stick surface.
- For my design I needed the following colors: (Palace) Purple, Gold, Light Blue, Dark Purple, Pink. (Rainbow) Red, Yellow, Orange, Green, Blue, Purple, White.
- Take a large ball of white gum paste. Combine white gum paste with purple food coloring. Press coloring into gum paste, remove the toothpick, fold the gum paste over (like a sandwich) to avoid getting the coloring on your hands as much as possible, and kneed the coloring into it. Continue until the coloring is solid. Add coloring as needed until you are happy with the color.
- Roll the purple gum paste into a ball and cover tightly with saran wrap. Gum paste will dry up quickly, therefore, always cover it when not in use!
- Take another, smaller, batch of white gum paste. Add yellow and a smidge of orange to transform the color to gold. To make a nice gold color, you always want the ratio to consist of more yellow than orange. Adding a tinge of red can also help. Roll into a ball, and once again, cover with Saran Wrap.
- Continue process until you have all of the desired colors, wrapping each ball with Saran Wrap as you go.
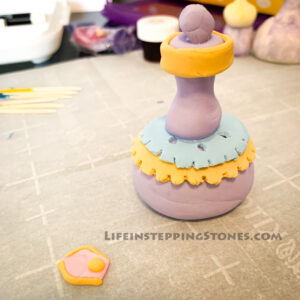
How to Make the Shimmer and Shine Palace with Gum Paste
Colors Needed: Light Purple, Gold, Light Blue, Dark Purple, Pink
- Separate the purple gum paste into four balls. One large ball and three smaller balls for the towers.
- Roll the large ball into desired ball shape (with flat bottom) for the base, then wrap in the Saran Wrap, and set aside. We’ll call this Ball A.
- Roll two of the smaller balls into matching cylinder shapes (Cylinder A & B). Wrap and set aside.
- Take a small pinch of gum paste off of the third ball. Roll the piece out enough that you can cut it and shape it into a small hexagon for the top of the genie bottle. Set aside, without wrapping, and let this piece dry.
- Roll the remaining third ball into a cylinder shape (Cylinder C). Pinch the middle to create the desired genie lamp bottle shape. Press the top and bottom of the cylinder lightly against the table to make them flat. Wrap and set aside.
- Separate the gold gum paste into three balls. Two will be used for the meringue shape palace tops, the other will be used for trimming and decorations. Wrap up the third ball that will be used for trimming.
- Roll each of the two balls and make sure they match in size. Pinch the tops of each to give them the desired meringue shape. Set aside. Do not wrap. Leave it out to harden a little bit.
- Remove Ball A from Saran Wrap and set aside.
- Roll out the third ball to cut shapes. Cut out a circular shape for the large ball’s trim, and use a toothpick to make indents and make round edging. Soften the edges using your fingers. Drape it over Ball A to ensure its the proper shape and size, then remove.
- Add edible glue to the top of Ball A. Drape the circular shape you just made over the top of it.
- Remove Cylinder C from the saran wrap.
- Cut out a longer rectangle and glue around the top of Cylinder C.
- Roll the remaining gold gum paste back up, wrap in Saran Wrap and set aside.
- Roll light blue gum paste and make a smaller circle than the gold circle you just create. Use toothpick to create small indents. Cute tiny diamond or circular shapes in a circular pattern around the inner part of the circle. Lightly drape over Ball A to make sure the size is accurate.
- Add edible glue to the top of the gold circle and drape the blue circle on top.
- Cut out a small gold rectangle and shape round edging, and then glue and wrap around the lower part of Cylinder C.
- Cut out a small blue rectangular, and make tiny toothpick indents as dots in the center, then glue to the middle of the bottom gold rectangle you glued on Cylinder C.
- Roll out pink gum paste. Cut small diamond shapes and a pentagon for a small door. Glue the diamond shapes around the center of Cylinder C. Set aside.
- Roll out dark purple gum paste. Shape into 8 small diamonds.
- Tear off small piece of gold gum paste and create frames around four of the diamonds, and the pink door. Roll a tiny ball and add to the bottom of the pink door. Let the gum paste pieces sit out for 5-10 minutes to harden.
- Glue the door to Ball A, and glue the purple diamonds with the gold frame to each side (two on each side of the door).
- Glue Cylinder C on top of Ball A. Glue the hexagon shape to the top. Set aside, uncovered.
- Remove Cylinders A & B from the Saran Wrap. Glue the remaining dark purple diamonds to each tower, two on each. Glue the meringue gold tops to the tops of each cylinder. Set aside, uncovered.
- Once all of the pieces have hardened, attach Cylinders A & B to the sides of Ball A. Let harden and congratulate yourself! You are done.
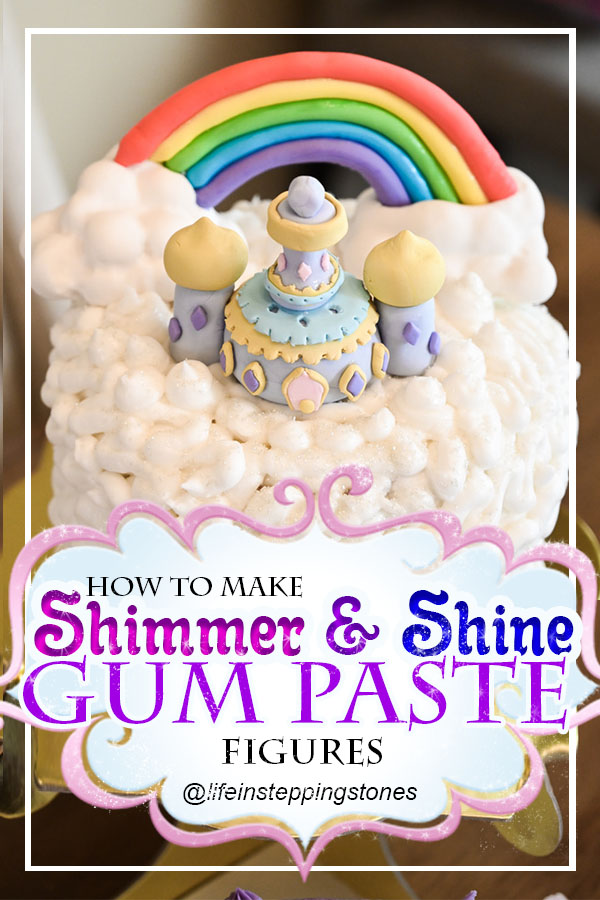
How to Make a Rainbow with Clouds Using Gum Paste
Colors Needed: Red, Yellow, Orange, Green, Blue, Purple, White
I have a confession to make. I completely forgot the color orange in my rainbow, which my 5 year old was more than happy to point out…both on this, and the rainbow prop I painted later. I don’t know why I forgot orange in the rainbow but I’ll just blame my Mommy brain!
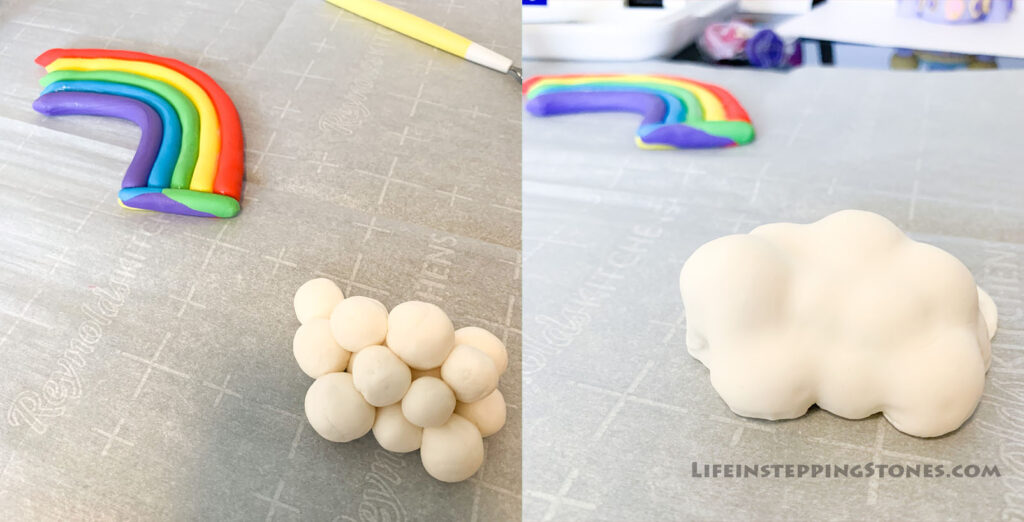
- Stretch out each color of the rainbow to make a rope. Curve over each other, and glue together, with each rope getting shorter in length. Leave out for at least 24 hours and let it harden. Pro Tip: Make it easier on yourself and use wire for the ropes. I neglected to do this (it turned out fine, but the wires would’ve added an extra level of sturdiness!)
- To make the cloud base, roll white gum paste into small balls and stack them together in the desired cloud shape.
- Roll a piece of white gum paste out into a thin layer and drape it over the balls. Use the ball fondant tool to smooth the gum paste over each ball so it shows each balls shape. Repeat steps to make the second cloud base.
- Cut out openings in each base for the rainbow to slide into. Glue the rainbow to the inside of the base.
Both gum paste figures need to be left in a dry environment. DO NOT REFRIGERATE or FREEZE.
I tried a piece of extra gum paste three weeks later, and it was just fine to eat, and not too hard to bite through. I tried another extra piece about five weeks later, and it was also just fine.
As far as these figures go though, we opted not to eat them. Instead, I dry wiped (and scraped) the frosting off of them after our daughter’s first birthday party and they are now displayed on a shelf in her room. It’s been four months since I made them and they are still in the same condition. From researching online, as long as you keep them in a dry environment, away from direct sunlight, they will basically last forever.
Shimmer and Shine Cloud Pillows
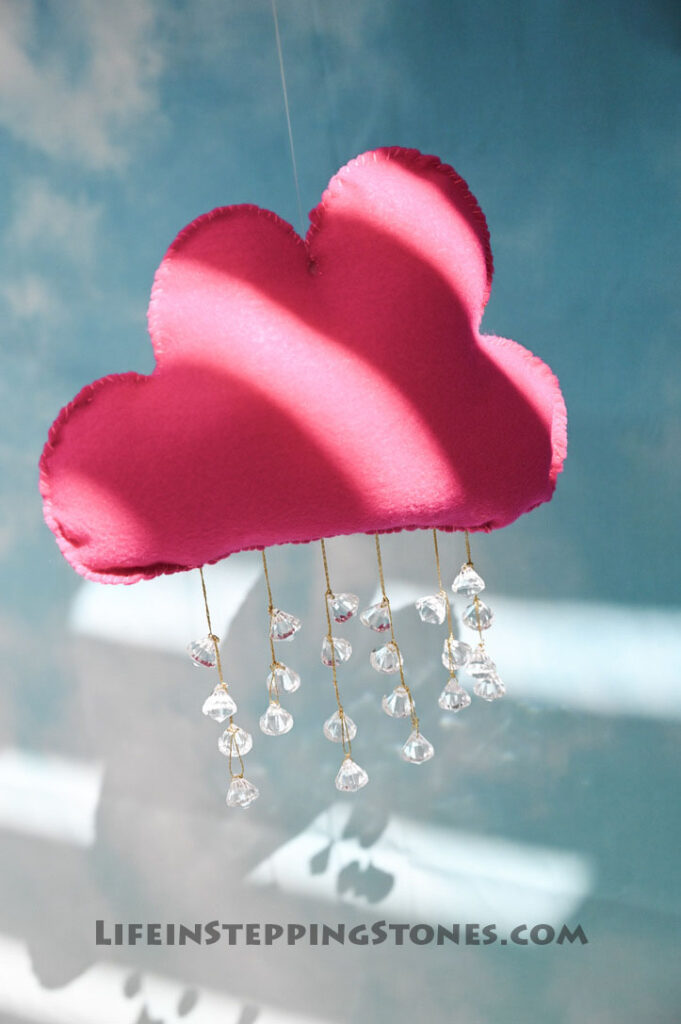
The clouds were one of my favorite projects, albeit the most tedious. After the gum paste experiment turned out so well, my imagination started running wild! The clouds were made a lot easier thanks to my Cricut Maker.
What You Need
- Two Sheets of Pink Felt (per cloud)
- Two Sheets of Purple Felt (per cloud)
- Pipe Cleaners
- Gold String
- Clear Diamond Like Gems with holes for threading
- Needle and thread to match felt colors
- Stuffing
- Invisible String
- Cricut Maker (or craft scissors if you don’t own a Cricut)
- Optional: Sewing Machine (I’m not an expert at the sewing machine so I decided to do these pillows by hand! But if you’re used to the sewing machine, by all means, use it!)
How to Make Decorative Cloud Pillows
- I first created the cloud pattern, which I’ve made available here to download for free.
- Place the felt on the Cricut fabric grip mat and cut the pattern.
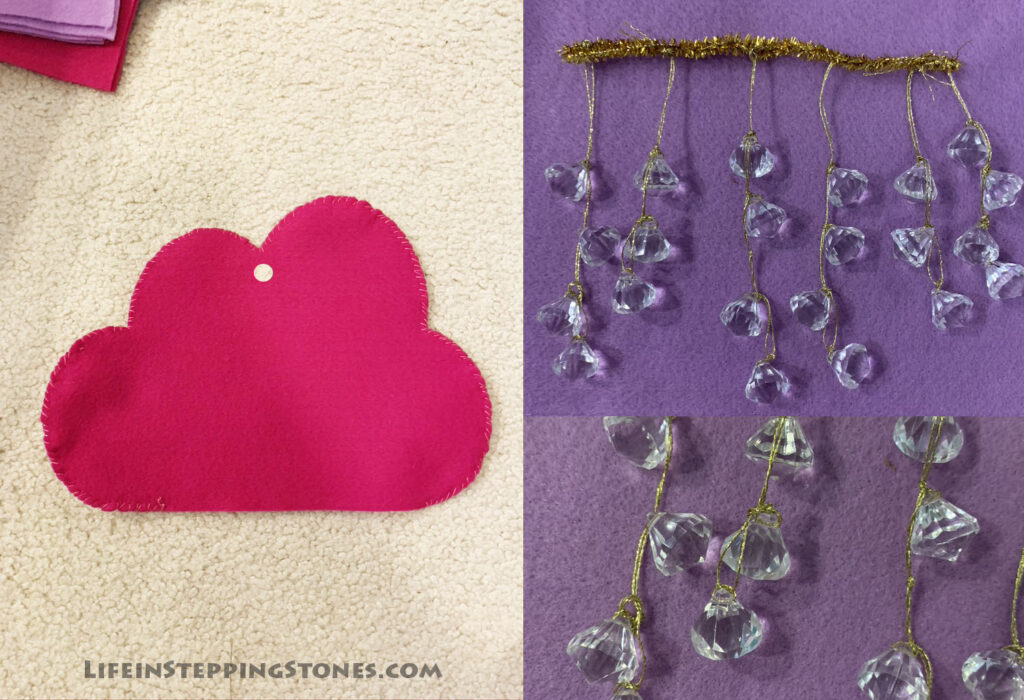
- While the Cricut is cutting, thread the gold string through each clear gem. Loop and tie along the way, creating gaps in between gems so they can dangle separately.
- Thread four gems each on four separate strings. Then thread three gems each on two separate strings.
- Wrap and tie them securely along the pipe cleaner, beginning with the four gem string, follow with the three gem, two of the four gem, the three gem, and finally the four gem again.
- Once the pillow shape has been cut, hand stitch with a blanket stitch pattern. Stitch to bottom of the cloud on each side, leaving the entire bottom opened.
- Stitch the hole for hanging.
- Fill the pillow with stuffing.
- Place the pipe cleaner (with the gems attached) at the bottom of the inside of the pillow, that you left unstitched. Push it in enough so its intertwined with some of the stuffing.
- Continue the blanket stitch pattern, securely sewing around and between each dangling string.
- Once complete, cut a piece of invisible string and tie it around the hole. Your pillow is now ready to dangle!
We used these cloud pillows for the cake smash shoot and now display them in our daughter’s bedroom.
Rainbow Prop
What You Need
- Three large foam boards
- X-Acto Knife
- Strong Bonding Glue
- Red, Orange, Yellow, Green, Blue, and Purple Craft Paint
- Paint Brushes
- Packaging Tape
- Mod Podge
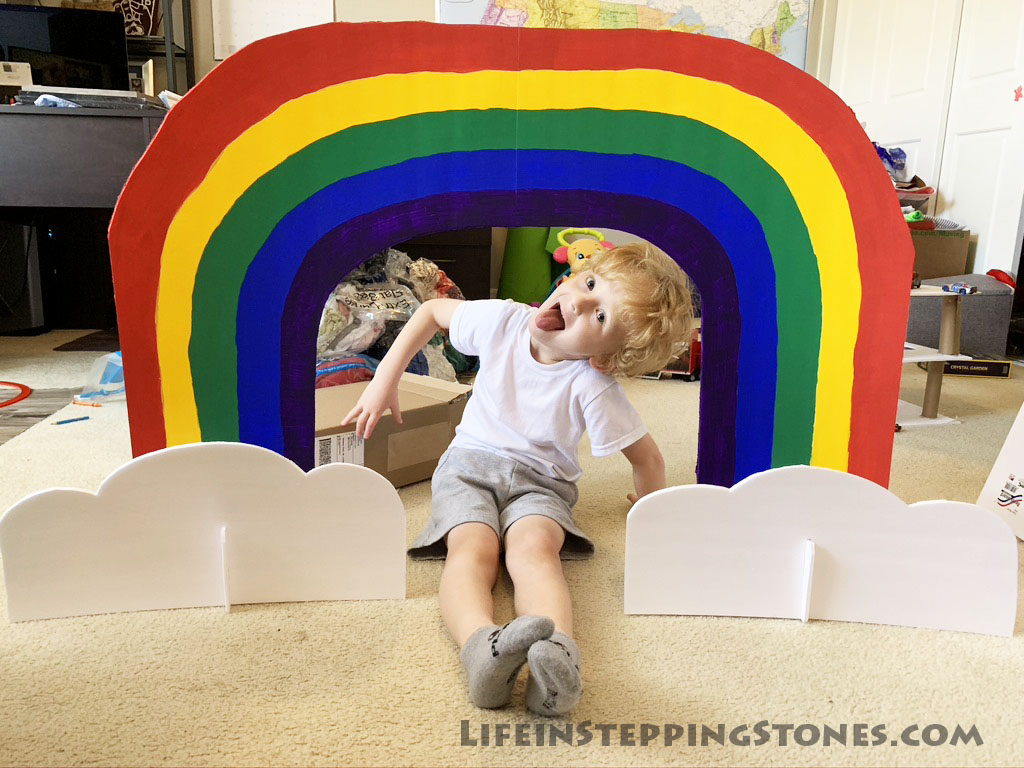
How to Make a Rainbow Prop
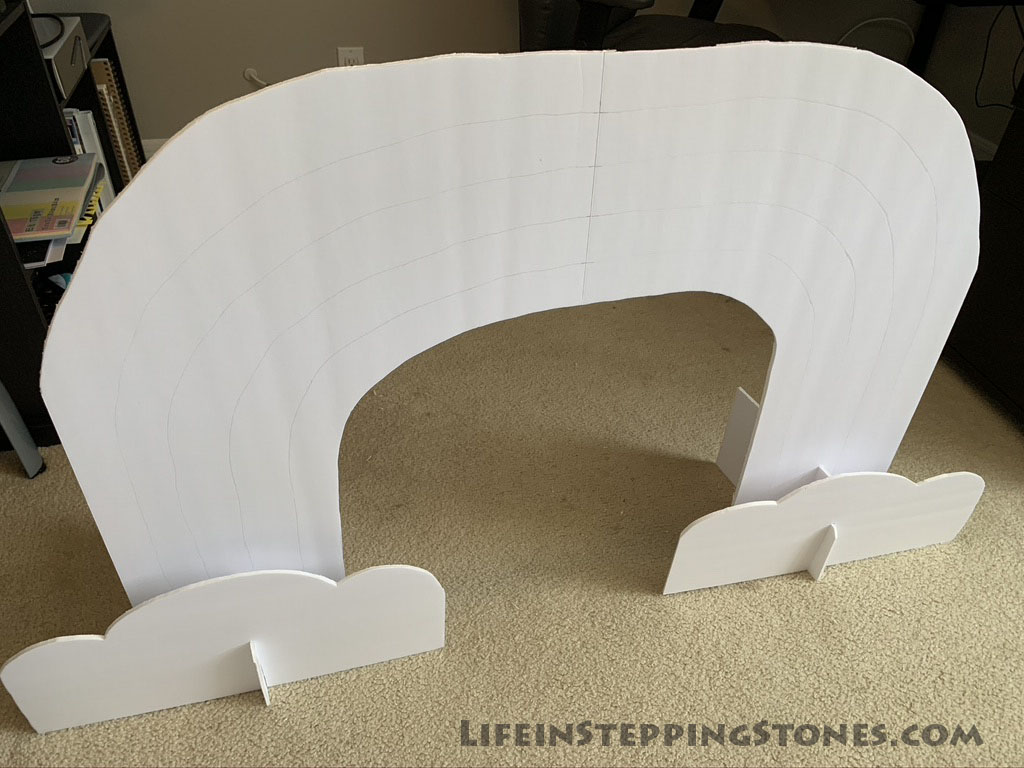
- On one foam board, draw one half of the rainbow. Cut out the shape, place over the other foam board, trace, and then cut the same shape. Tape securely together on the back. Measure the thickness of the foam board and cut a gap in the middle of the bottom of each side of the rainbow for the stand you’ll make to slide through.
- Draw cloud shapes on another foam board and cut out. Create the same width of a gap on the center of each cloud, starting from the bottom to the middle.
- Cut two rectangular pieces. Keep a lip on each part to keep the rainbow and clouds from sliding off.
- Paint the rainbow and then coat 1-3 times using Mod Podge.
- Attach the rainbow to the rectangular bases and place the clouds on the front of the bases to add a finishing touch.
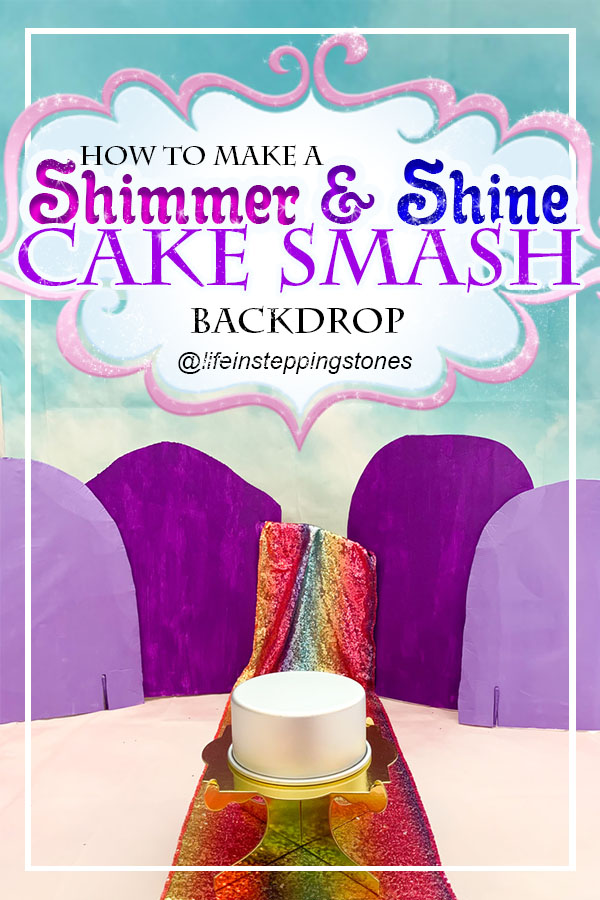
Cake Smash Scene Setter & Props
To create the smash cake scene, I was lucky enough to have a large box on hand. If you have large pieces of cardboard, you can make a mini photo booth studio using cardboard on the back and the bottom.
What You Need
- Old Master Cloud and Mist Backdrop (5×7) (or find similar here on Amazon)
- Rainbow Waterfall Table Runner
- Foam Board
- Light purple and dark purple paint
- Paint brush
- X-Acto knife
- Double sided tape
- Large sheets of cardboard
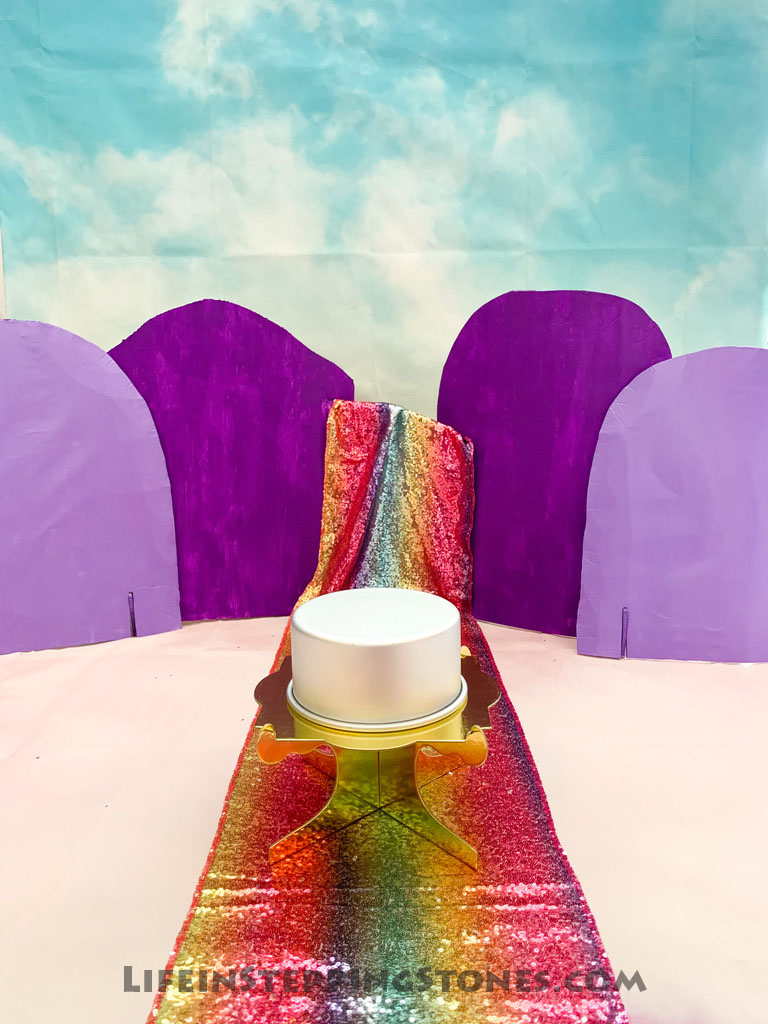
How to Make It
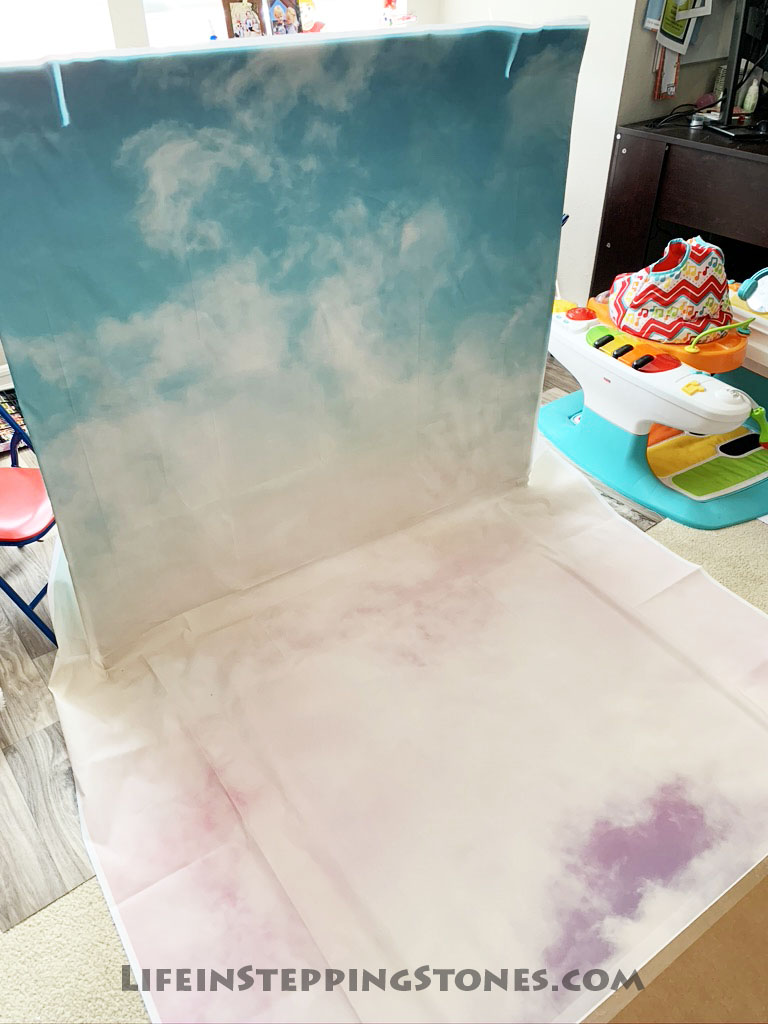
- Fold open large cardboard box and cut the sides opened. Lift one side of the box to create wall, with the other side staying to the floor. Secure wall side if necessary (or prop it up against a wall to keep it in a standing position)
- Attach backdrop using double sided tape in increments, pulling tightly, and smoothing along the way to remove any folding lines.
- Cut foam boards in the same of smooth rocks. Cut slits into each board and place small rectangular boards in between to stand them up, and connect them.
- Cut one board lower for the “waterfall” to be draped over.
- Paint the foam boards the purple tones, and then connect to each other.
- Drape the rainbow table runner over the middle board and run along the center of the backdrop. Secure with double sided tape.
- If you’d like to keep the table runner after the cake smash, using the double sided tape, tape Saran Wrap over the top of the runner.
Food to Serve
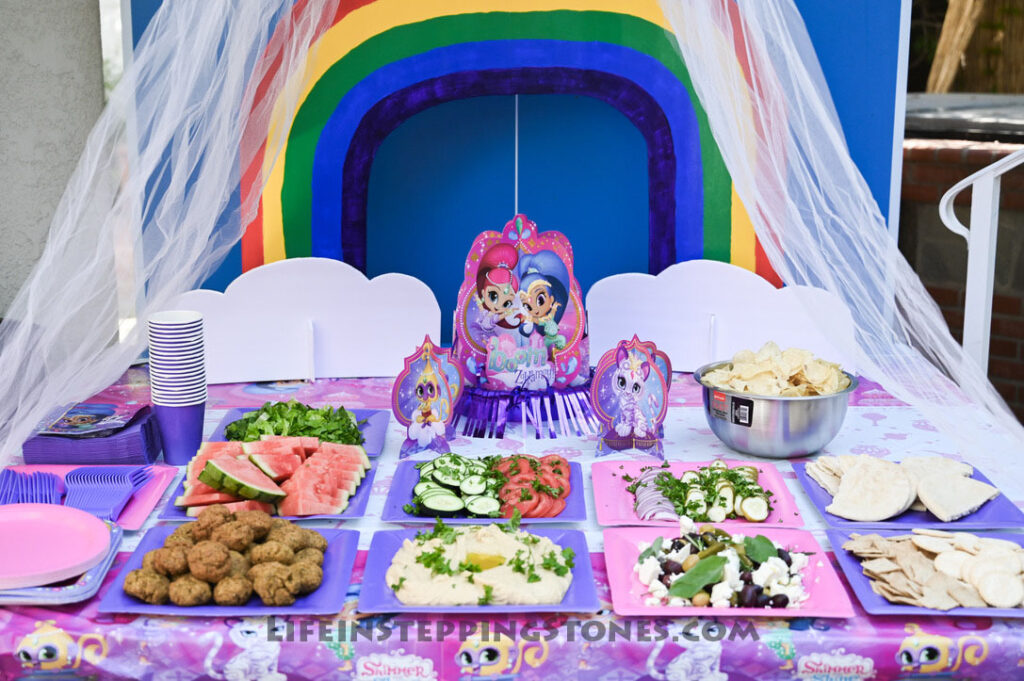
Last but certainly not least, it was time to figure out what food to serve! I looked around Pinterest a lot for inspiration and found ideas like Magic Carpet Roll Up Sandwiches and Mini Flatbread Magic Carpets. However, because our party was mainly adults, to go with the genie theme, we opted for a spread of Middle Eastern food. We offered falafels, hummus, pita bread, greek salad, and vegetables. We also included some chips for the kids and watermelon. The food selection was a huge hit!
It’s always funny to me how I’ll spend months preparing for a party, and the party only lasts a couple of hours. It’s worth it to me every time though! Our daughter may not be able to remember her first birthday, but she will always be able to enjoy the pictures, and for everyone else, including our oldest son, we were able to enjoy the experience and decorations! Our daughter also will also have the pillows and gum paste figures theoretically forever and appreciate them in the years to come.